Several weeks ago, I promised to do a review on my personal embroidery machine. Well perhaps "review" wasn't the appropriate word to describe my intention. What I hope to do is to provide you with information that I would have liked to have had several years ago when I was first pursuing a machine for myself. I knew absolutely NOTHING about embroidery machines, so when doing the research, I didn't even understand the terminology to know what to look for. Since then, I've learned quite a bit about these things, but I am certainly not an expert.
I'll start by saying that I ended up with a Singer Futura. And this is what it looks like. It was about $600 new.

It's pretty light, considered portable, and converts between an embroidery machine and a standard sewing machine by switching out the arm. The embroidery stitching happens just like a sewing machine -- the needle moves up and down, sometimes very fast. The design is produced by moving the hoop. So while the needle is stitching up and down, the embroidery arm will move the hoop right, left, forward, and back, wherever it needs to be to position correctly under the needle.

Most of the machine resembles a modern sewing machine. The only thing that makes it look different is the embroidery arm.

This is an embroidery hoop for my machine. This model comes with two sizes upon purchase, and does not currently have the option for purchasing other sizes (at least not last I checked.)
In general, these come in any number of sizes. They are specific to the particular machine and usually not interchangeable except within brands. Different hoops generally serve a different purpose. There are even cap hoops made especially for embroidering on baseball caps.

There are a number of supplies you'll need to get started. If you're purchasing new, you'll usually get a basic kit with your machine.
The first and most obvious is the thread. Embroidery thread is different from regular sewing machine thread. It has a much more glossy sheen, plus I believe it's a little stronger. You won't want to use regular thread -- you'll be disappointed with the finished product. Spools run about $3-5 each.
Next is the bobbin thread. This threw me originally because when I sewed previously, I used the same thread on my bobbin as my stitch thread. But, again, the bobbin thread for an embroidery machine is different. It's much thinner and stronger. You can purchase thread on a spool (mine is huge!) and spin your own bobbins, or you can purchase the bobbins pre-loaded. Prices will vary depending upon what you purchase.

Another important item you'll need is the stabilizer. Stabilizer is used as a backing to the item you want stitch to provide extra support. It helps prevent the item from puckering or ripping. It's always amazed me that the machine can place so many stitches without the design simply popping out of the fabric!
Stabilizer comes in every imaginable size, shape, and style. These include basic, iron-on, water-soluble, thin, thick, pre-cut sizes, etc.

To get started, the fabric is loaded into the embroidery machine, with the stabilizer on the backside. This can be a little tricky until you get used to it because you need to know where the design is going to stitch within the hoop. Most machines will allow you to re-position the design at least somewhat.

For this particular machine, I do NOT like the way the hoop loads into the machine. It has a couple of screw-down clips. It's functional, but I've used other machines since and there are much better ways that seem to be equally stable.

Now comes the real difference between machines, which is why I decided on this one.
The operation of the machine is managed by software loaded onto your computer. The computer is connected to the embroidery machine via a usb port. Since I knew computers and didn't know embroidery machines, I thought it would be a shorter learning curve. Plus, I already had a computer so I didn't see a need to pay for a "second" one in the embroidery machine. It's a bit inconvenient if you want to travel with it because the computer is required to operate the machine, but mine hasn't moved from my desk in 3 years so that doesn't appear to be a problem for me.

The software is very easy to learn. It's industry standard, WYSWIG, and not overloaded with features so you won't spend all your time learning and can get stitching right away. I especially like the thumbnail view of the designs.

After a design is selected, the software displays a realistic view.

Each component of the design is separated and can be managed individually or as a whole.

When the design is ready, one click sends it to the machine for stitching. Each section is prompted to allow for thread color changes. A button on the front of the machine starts and stops the actual stitching. No foot pedal is used for the embroidery function.

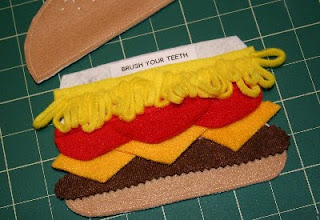
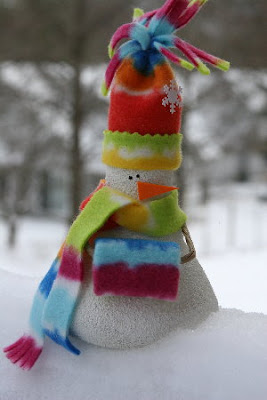
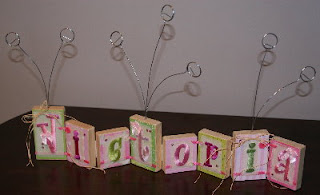
One of the features that comes standard with the newer versions is an option to convert a graphic image into an embroidery image. I don't think this would be good for doing something too complex, but I've used it for a number of things where it came in really handy. For example, a couple of years ago when my son was in kindergarten and he and his classmates were just learning to write their names, I used the option to convert their hand-written name to an embroidery stitch. I combined this with their handprints and put it all together into a quilt for the school fundraising action. I also stitched the pledge of allegiance around the border of the quilt.

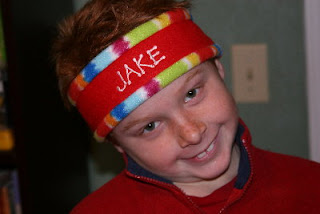
It also has a number of additional software packages that can be purchased and installed separately. One that I just purchased recently is the Hyperfont package. It will convert anything you type in any font on your computer into a stitch! And I have literally hundreds of fonts. This has proved out to be worth every cent, even though it's a bit pricey at just under $200. There are bargains out there if you shop around.

As with the rest of the functionality, the package is very user friendly and WSYWIG.

And there's a feature with this machine that I haven't found on ANY other machine I've looked at. Most machines will allow you to resize an image, but it's always proportional. Also, some of them are very restrictive, only allowing a 10% adjustment in the size. The software that comes with this machine allows you to adjust a design in any manner, as well as rotate to any degree! This feature has been invaluable to me.
There are a number of additional positive features with this machine:
- It has an auto-sensor that detects thread breakage. Some machines will just keep plowing on and make a huge mess of your project.
- It lets you advance or reverse stitch location. This is helpful if your thread breaks and you need to recover the last 10 stitches, for example.
- There is help text available with the software package.
- There are user groups online that can be very helpful with questions.
- It processes any embroidery file type, so it's not limited to brand formats.
- The usb processing allows the load of any design. It's not restricted to processing from a design card, which could be an investment nightmare.
There are a couple of downsides to this machine. I already mentioned the hoop mount.
- It also doesn't have the BEST stitch quality. It looks perfectly fine to the untrained eye, and does better on bigger stitches, but a side-by-side comparison will present a difference. But then it's not a $5000 machine either, so I wouldn't expect the same result.
- It does not allow downloading of font files. So, if you don't want to drop $200 on the Hyperfont software, you're stuck with the two basic fonts that come with the machine. You can resize, bold, italicize, etc. but they're just basic fonts which can't be changed.
- It does not tell you when your bobbin thread is running out, it just runs out. But since I run it out anyway, it's somewhat of a moot point for me. Plus I've used machines that pop up warnings constantly, and that's annoying too.
- The stitch advance only moves in single stitches, and doesn't allow large jumps. So if you need to advance a large jump, it's a slow process.
And with all machines, if your stitching goes really bad, it's usually a trashed object. Ripping out a design is nearly impossible.
I hope this helps! There are certainly other factors that will mean more to you than to me, like if you're wanting to go into business, or if you're not particularly comfortable with computers. Just keep in mind that with anything, the initial purchase is only the beginning of your costs.
If you like the embroidery results but don't have on your list to get yourself a machine anytime in the future, you might want to enter my March giveaway. Get the details
here.
And be sure to check out the endless list of inspirational ideas at my home page
childmade.com.
I'll be linking up on the following McLinky parties:
SundayThe DIY ShowoffMondayDIY Day at A Soft PlaceJust Something I Whipped UpMake it Mondays at the Persimmon PerchTuesdayReinventedToot Your Horn TuesdayToday's Creative BlogWednesdayPenny Pinching Party at The Thrifty HomeShow and Tell at Blue Cricket DesignsThursdayTransformation ThursdayShow Off Your Stuff PartyStrut Your Stuff ThursdayThrifty ThursdayGet Your Craft on at Life as Lori
FridayShow and Tell FridayFrugalicious FridaySaturdaySaturday Night Special