My mom has a deep passion for homeless pets and has been working with adoption groups in one form or another for over 35 years. She currently fosters anywhere from 12 to 20 puppies at a time, plus a number of older "forever fosters." She truly puts in an amazing amount of time and effort, not to mention her own funds.

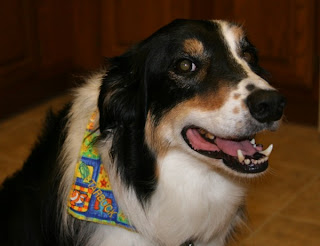
This is Starbuck, my rescued Border Collie. I could go on forever about all of the wonderful things about him, but I'll just sum it up by saying he is the best dog in the world. So needless to say -- but I'll say it anyway -- I am a fan of what she does. I could never do it myself, however, because the 20 puppies would never leave and soon I would be one of those people you see on television.
So I help in the ways that I can, which is all any of us can do. One of the things I do is make personalized dog scarves as a token of appreciation for an adoption. The adopted family picks a print style that suits them and I embroider it with the pup's new name. I also offer the personalized scarves at the adoption events as a fund-raiser for a minimum $5 donation.
Today I thought I would share the instructions for making them. They are quite simple and very cute and I think every beloved pet should have one.

You'll need a small square of fabric, with the size depending upon the size of the dog. My formula is as follows: to determine the size you need, measure the circumference of your pet's neck, loosely like a collar would fit. Then divide in half. The size you need will be the nearest size (equal to or less than) half the length.
So for example, if you have a good-sized dog like Starbuck with a 16" neck, you'd start with an 8" square of fabric. Generally, my sizes run 4"-extra small, 5"-small, 6"-medium, 8"-large, 10"=extra large.

You'll start by tucking in the ends. Fold in two opposing corners. The size of the fold depends upon the width of the collar. If you don't have the collar handy, this isn't an exact science and you can usually estimate pretty easily. Generally, small dogs have thin collars, larger dogs have thicker collars. You'll want to make the length of the fold a little over twice the thickness of the collar. So for my 8" scarf for Starbuck, my fold is usually 3" long. (As you read through the instructions, this should make more sense later.)

Stitch down the corner folds, running a stitch just inside the fold. Next, fold the scarf in half, right sides together, aligning the two remaining (unstitched) corners. Stitch along the raw edges.

After folding and stitching, you should have a scarf that looks like the picture above.

Next, turn the scarf right-side-out, using the opening in the folded corner.

Align and press the seams.

Now your scarf should be looking like the picture above.

Next, you'll need to run a stitch parallel to the top fold. This should be wide enough to fit the collar. Basically, the stitch should run from folded corner to folded corner and align with the ends of the corner fold. Wow! That's tough to describe! The pictures of the finished scarves at the bottom of the post show the alignment of the collar stitch, which might help if this isn't clear.

If you have fancy stitches on your machine, you can dress up the edges.

Next, feed one end of the collar through the opening in the scarf.

As long as the opening is wide enough, the collar should slide through easily. And that's it! You'll never have to worry about the scarf being too tight, or coming untied. When it gets dirty, just slip it off the collar, wash it out, and lay flat to dry.

Your pet will be so pleased with its new duds!

For my give-away this month, I'm offering a package of 12 personalized dog collars, one for each month. That's a $60 value! You'll get all the major holidays and a few seasonal prints too. Just tell me the size you need, the name of your pet, and I'll personalize them and have them to you before Christmas. Give-away ends 11/24. Just leave a comment to enter! (ps. I LOVE comments about your rescued pet!)
And don't forget to check out the many inspirational links at
www.childmade.com!
And the winner, thanks to RANDOM.ORG, is.....
(drum roll please...)
#2 NIC AND DAVE!!!
They have two adorable adopted pups named Oliver and Roxy, which are featured all over their blog
LIVE. LOVE. LAUGH.Thanks for your entries/comments! Hope to hear from you again soon!


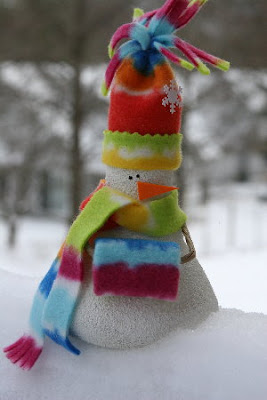
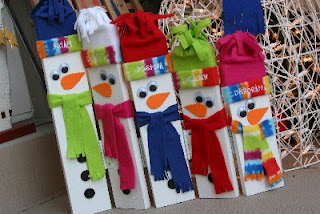

 Not the toasty and bubbly hot tub we might enjoy, but perfect for Frosty and his friends! This is a craft that kids just love, and a perfect way to re-purpose some dollar store items
 The supplies you will need are as follows:
 Begin by stuffing the fingers with fiberfil. It's not necessary to close off the bottom.
 Next, shape the orange felt into noses and glue to the face of the snowmen.
 Attach the eyes.
 Arrange the 3 snowmen in a bundle, offsetting the height so that the snowmen in back aren't hidden by the snowman in the front. Glue them in position.
 Now, set the snowmen in the bucket. If they sink too low, just add a little filler to the bottom of the bucket to raise them up (fiberfil, tissue paper, etc.) Glue the snowmen into the bucket, but be careful to leave open the areas around the snowmen to put the ice cubes.
 Fill the open areas with the ice cubes, slightly overflowing the edges of the bucket.
 Form the piece of greenery into a circle.
 Tie the ribbon into a bow and glue it onto the piece of greenery to form a wreath.
 Position the wreath on the front of the bucket and glue in place.
 Write up the sign on the piece of card stock. Glue the stick to the back.
 Insert the sign into the bucket behind the snowmen. Add a few snowflakes to the corners of the sign. And that's it!


