Fence Post CHAPEL Tutorial

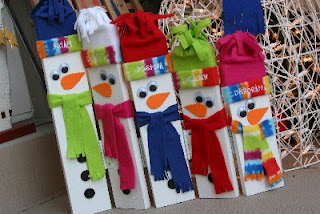
My bff called me one day and told me that her neighbor was having her fence replaced, and that she was grabbing the materials from the fence they were taking out. And, of course, that it was my job to figure out what to do with it.

Understand, we have been responsible for some time for a craft workshop at our church, and when we prepare for it, we need supplies for 300 of each craft. That means that we get very creative in our material sources, and anything cheap or free that we can get in quantity is golden to us. So, ironically, when she called me and told me about the fence, I encouraged her to get as much as she could and we would figure out what to do with it later on.

This particular craft was designed from the posts of the fence. We had to cut them down and repaint them, but otherwise they were nice pieces of cedar in which any weathering simply added to the appeal of the final product.

For supplies, you will need the following:
1 - 4" x 4" piece of cedar/wood cut to an 8" length. Cut the roof section at a 30/60 degree angle.
1 - 8 1/2" by 3 3/4" piece of black cardstock
1 - 3" x 4" piece of white paper
1 - printed template for window (printed window size should be 3" tall x 2 windows)
1 - printed template for door (printed door size should be 2 5/8" tall, red paper)
1 - printed template for steeple (printed steeple should be 4" tall)
1 - 6" length of 1/4"-wide red ribbon
1 - 1" tall cross
1 - assorted colors of tissue paper, confetti cut
For tools, you will need sharp scissors, clear-drying glue, and a sharp nail or scoring tool. Depending upon the condition of your 4"x4" piece of wood, you might need to paint it white, perhaps in advance to give it time to dry.

Let's get started...

First, spread out the tissue paper evenly, covering an area large enough for the windows.

Spread a generous layer of glue on the backside of the window template. Turn the template over and lay it glue-side-down onto the tissue paper and press firmly.

Lift the template and make sure there are no gaps between the pieces of glued tissue paper. If there are any gaps, finger-press some pieces of tissue into the gaps.

Apply a generous layer of glue onto the piece of white paper. Apply the glued side of the paper to the tissue side of the windows and press together. Now, set the windows down on a flat surface and use the wooden chapel piece as a paperweight to hold the window parts together as they dry, while you continue with the next step.

Next, cut out the template piece for the steeple. Use a sharp nail or a scoring tool to score the four lines leading out from the top. The deeper the score, the easier the fold, but be careful not to go through the template.

Now turn in the steeple sides, folding on the scored lines. Align the open edges, overlapping as indicated and glue in place.

Fold the piece of black cardstock in half. If you have a corrugating tool from your scrapbooking supplies, it adds a nice texture to the roof but it's not necessary. Glue the cardstock to the roof of the chapel, aligning the fold with the peak.


Glue the steeple in the center of the roof of the chapel. Since only the very bottom of the steeple touches the roof, place a line of glue only along the very bottom edges on the two lowest sides of the steeple.

Trim off the tip of the chapel about 1/4" to provide a base for the cross, so that the cross has a little footing to glue on to.

Glue the cross onto the top of the steeple.

Position the door in the front center and glue in place.

Curl the piece of greenery into a circle and glue the ends together to form a loop. Tie the red ribbon into a bow and glue the bow onto the wreath, covering the glued ends of the greenery if needed.

Glue the finished wreath onto the front of the chapel above the door.

Optionally, if you'd prefer that this be a non-seasonal craft, you can replace the Christmas wreath with a tiny grapevine wreath. Another idea is to substitute a printed message, such as a bible verse, a greeting, or the name of a church.

Now that windows have had a bit of time to dry, cut out the windows, being careful to leave the printed template intact.

Glue the windows to the sides of the chapel.

You're done! Now just find an appropriate place to put it, or even better, a wonderful person to give it too.


Steeple template


Chip Clip SNOWMAN Tutorial

I have a "thing" for making something unexpected out of something else. I've somehow developed a fairly keen ability to think outside the box, which has really been fun and interesting in creating new ideas. Unfortunately, it's inside the box that I'm often not very good at.

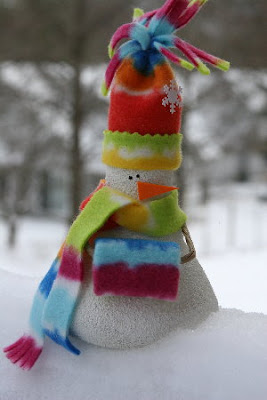
For today's craft, I thought I would show you how to make a cheerful snowman out of a magnetic chip clip. I found these clips at the dollar store for 3 for $1.00.

The materials you will need are as follows:
1 - 3" chip clip (the sample shown was from Dollar Tree, 3 per card)
1 - 3" x 4" piece of fleece
1 - 1/2" x 8" piece of fleece
1 - brown chenille stem
1 - 1/2" white pom
1 - 1/2" x 1/2" piece of orange felt or craft foam
1 - 1/2" decorative snowflake
1 - small rubberband
For tools, you will need a scissors for the felt, wire cutters or a strong pair of scissors to cut the chenille stem, a fine black marker, and glue (hot glue is faster but white glue is safer for children.) You will also need to seal one side of the fleece for the hat, which can be sewed or glued.

Gather the supplies and tools. Take the 3" x 4" piece of fleece and fold it in half, so that you now have a piece that is 3" x 2". Sew or glue the open edge of the 3" side, which will form a tube 2" wide. If you're making these in quantity, such as for a classroom party, it's easiest to cut a long strip of fabric that is 4" wide folded to 2" wide, sew the whole length all at once, then cut the 3" lengths from the longer strip.

Next, turn the tube inside out so that the edge of the seam is turned inside. Place the rubber band tightly around one end of the tube about 1/2" from the edge of the fabric.

Use the scissors to snip the 1/2" length of fabric past the rubber band to form the tassels for the hat. Turn back the other end of the fleece to form the cuff of the hat.

Open the clip and slide the hat over the end of the clip, positioning only on the front half of the clip so that the clip will continue to open. Don't glue the hat in place until after you've positioned the scarf.

Open the clip and slip the 8" piece of fleece into the clip near the hinge.

Bring the two ends of the scarf to the front and tie. Lightly glue the scarf and hat in place.

The arms of the snowman should be about 6" long. Cut two additional lengths of chenille stem about 3/4" long each. Twist the short pieces around the ends of the long piece to form hands.

Insert the arms into the center of the clip and glue in place with the scarf.

Glue the 1/2" white pom into one of the hands of the snowman.

Position the other arm as a wave. Finish your snowman by trimming the orange felt to make a nose and glue in position on the face. Use the black marker to draw eyes, and optionally a mouth. Glue the snowflake to the hat.

That's it!!

If you can't find the exact chip clip, you might need to alter the measurements of the hat slightly. Just measure around the end of the chip clip where the hat would sit, and substitute the new measurement for the 4" length, adding 1/2" allowance for the seam. If you're adjusting by a lot, you'll also want to consider whether the height of the hat is adequate, as well as the scarf and arm length.

Let me know how this worked for you.

Remember When...

Perhaps you're one of those people that spend all your spare time scrapbooking. Or perhaps you're more like me and have all the good intentions of doing so, but can't ever quite find the time.

Today, take a few minutes and sit down with your children and go through your albums and photos and memory boxes. Though it's true that a picture is worth a thousand words, there is no replacement for sharing your thoughts and feelings about the moment the photo has captured in time. Your child will LOVE to hear about his/her silly antics, the special things they did, the warm feelings you experience when you think about the moment. For some pictures, they'll be able to remember it and can share thoughts of their own.

Be sure to include some pictures of family and friends, too. Perhaps pictures of great grandma and grandpa that came to this country a 100 years ago, or Skipper, your childhood best friend. Your family and life together is the very best story you'll ever share with your children.

Recycled Dog Collar Tutorial

This is one of the cutest things I've discovered in a while -- a dog collar made from a recycled shirt!

The craft is presented on www.craftbits.com and you can get the instructions for it here.

I'd be a little careful with the embellishments you add to the collar, in case your dog is one that likes to eat things besides food.

And right now, my head is trying to figure out a way to work in a mini recycled necktie.... I'll post again if I come up with something.

Craftbits.com has a wide variety of other craft ideas complete with photos and instructions, all neatly categorized.

Give Someone a Random SMILE Today


With today's hectic and stressful lives, it doesn't take much to send someone over the edge. On the other hand, it doesn't take much to make someone's day either. Sometimes the simplest gestures leave the biggest impression, especially since they're more likely to happen. The school across the street once had a sign that read, "The smallest of actions is more valuable than the greatest of intentions."

The dollar stores around here have mylar balloons for a buck. One of them near me has a design that is a bright, yellow smiley face. The ones near you might have the same pattern, or certainly something similarly cheerful. For your pay-it-forward this week, buy one or a couple or a whole bunch, and then give them to people for an instant face lift. You can also tie an encouraging note to the string. This can be done anonymously or with full disclosure.

Some examples of people who might need a face lift:
- co-worker
- teacher
- mailman
- bank teller
- hair stylist
- next-door neighbor
- bus driver
- your child or spouse

Some ideas for attached notes:
- "Have a GREAT day!"
- "You are appreciated"
- "Smile, you're on camera"
- "You make the world a better place"
- "Thought you could use a smile today"
- "Don't worry, be happy!"
- "Be a kid today"

The great thing about a pay-it-forward is that it often does as much for the sender as it does for the receiver. In fact, I bet you're smiling already just thinking about who you might target.

NOTE: I would suggest not substituting with latex balloons, as you might not be aware of latex allergies or restrictions.

Up Close and Personal

Grab yourself and your child a magnifying glass and head outdoors! If the weather is bad, inside is the next best thing.

Take a close look at the things around you that you overlook everyday. Perhaps a flower, a bug, peeling paint, a blade of grass, an orange peel.

Use the opportunity to teach your child about the things he or she is looking at. It's one of the best hands-on classes available, and so much more interesting than reading the lesson from a book. Ask him to describe for you what he's looking at, to exercise his vocabulary.

To make it even more fun, create a story adventure about exploring a far-away jungle or an alien planet. Use small figurines if available. Let him contribute his own storyline. Make the experience a time to remember, with the added bonus of learning something at the same time.

NOW is a Good Time Tutorial

Whoever coined that phrase has my undying gratitude. It has become my mantra. It's sort of like the old saying, "a stitch in time saves nine," except not as fluffy. It's more like something my mother would say to me.

Do you remember the story about the cobbler and the elves? The one where the old cobbler would go to bed at night and a couple of elves would come in and make up his shoes for him? Whatever happened to those elves? I want to know. I really need some. Elves, that is, not shoes. And I don't need them for making shoes, of course, but for everything else. Well, maybe some shoes too.

I have a horrendous list of things to do, and they're all past due. I would have never considered myself a procrastinator, and I'm still not really sure that's the appropriate description, but I'll have to get back to you on that later. I really think it's just more a matter of too many things to do on my to-do list, and me not being the greatest at prioritizing. So I want some elves.

One of the worst by-products of my poor management is "piles" all around the house. Piles of things that I'm "going to get to one of these days." And I sincerely have every intention of doing exactly that, it's just that "one of these days" is not on my calendar. So piles become more piles.

And piles cause me stress. Because in spite of being really good at making them, I really don't like them. And I don't like things on my to-do list forever either. So with my new mantra repeating in my head, I'm willing myself to do those piles one at a time. Because I haven't been able to find any elves.

Or perhaps they simply aren't coming because they're afraid of being crushed by a falling pile.

My "do-it now" for now was to separate and transplant a pot of African violet leaf propagations that I did too long ago to remember. So I put down some newsprint, opened my bag of potting soil and got to work.

After removing the clump from the single pot, I gently separated each plant, keeping as much root intact as possible. Then I pruned as necessary, planted each plant in an appropriately-sized pot, and watered them in. Initially, it appeared a bit like a violet massacre. But honestly, it's all part of the process and no violets were harmed in the making of this post.

This process always results in a few leaf trimmings, either because they were trimmed off on purpose or they were broken off in the handling. Check back later and I'll show you how to propagate from just a leaf.
Meanwhile, my task is done, and when I stand at the kitchen sink, I can view my grandma's violets without being distracted by the nagging task on my to-do list. "Now" really was a good time!

Save it for a RAINY DAY

How many times have you come out to the parking lot after work or after shopping, only to find it pouring down rain and you without an umbrella? How many times have you noticed other people in the same predicament?

The dollar stores have compact umbrellas for a buck. Frankly, I can't comprehend anyone being able to purchase the materials, manufacture, and ship umbrellas across the ocean, and still be able to sell them for $1, but they do! For this week's pay-it-forward, pick up a few umbrellas and keep them in your car. Then the next time it rains, hand them out to needy bystanders.

You can even make it an intentional excursion and head out to the nearest city bus line. People waiting at bus stops are helpless to do anything about their circumstances if they get caught unprepared, and will likely be very grateful for the simple comfort of an umbrella.

Paper DOILY Bird Tutorial

I thought I would post a simple idea that doesn't need much instruction, but which I thought was utterly wonderful. This is not an original idea but came out of my archives. Unfortunately, that means I don't have a source (could be grandma, could be something I saw at a craft fair years ago, could be something that morphed in my head.) In any case, I hope you enjoy it.

For this project, all you need is one paper doily, any size, and a 6" length of narrow ribbon. But I'd recommend having more than one handy, since they're so easy and I'm sure you'll want to do more than one. For tools, you'll need a pair of scissors and a hole punch.

Using the template below, or something similar, cut out the parts for the body and the wings. Fold the body in half from the tip of the beak to about half-way down the back. Cut a slit through the fold at an angle as indicated in the template. While folded, punch a hole past the fold into the section just cut, as indicated on the template.

Now slide the wing section into the slit, tie the ribbon through the punched holes, and that's it!

Since you can get paper doilies at the dollar store for about $1 for 100 doilies, you can make tons of these for just a few bucks.


Extraordinary lunch

Everyone has to eat. It's just a matter of what, where and how.

Do something unusual with your child for lunch today. Make a couple of peanut butter and jelly sandwiches and go have a picnic in his playhouse. Don't have one? Throw a blanket on the floor in the living room.

Make faces on the sandwiches or with other menu items.

Use the really fancy dinnerware and cloth napkins.

Eat with chopsticks.

Play a game.

Let your child create the lunch menu. And you eat it too!